This section will cover:
- Introduction
- Creating a Custom Group
- Editing a Custom Group
- Renaming a Custom Group
- Copying a Custom Group
- Knowledge Check
Introduction
The learning objectives for this page are:
- How to change and edit the field list to more efficiently create your table
- How to combine items on the field list
When creating your custom bespoke table in Stat-Xplore, if there are specific combinations of field items that you are interested in, you can use Stat-Xplore's custom data feature to combine items into your own groupings of values (also referred to as "recodes"). Once you have created a custom group, you can use it in your tables. However, please note that you cannot access this function if you are logged in as a guest user.
To access this in Stat-Xplore,
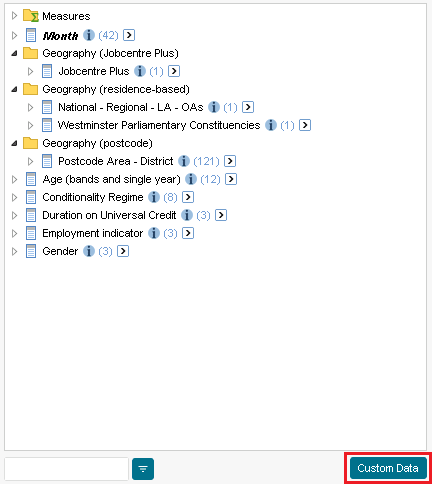
- In your currently open table, click the ‘Custom Data’ button located at the bottom right of the list of fields at the left-hand side of the page.
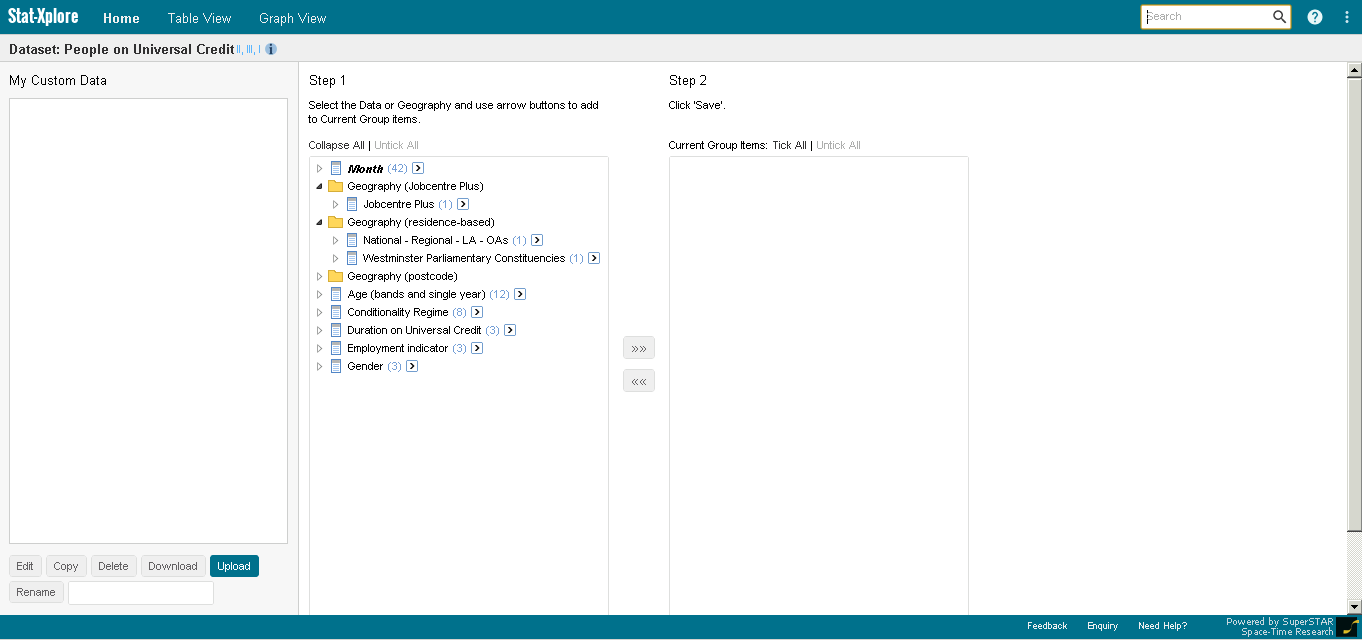
- Stat-Xplore will then display the ‘My Custom Data’ page where you can create and manage your groups.
Creating a Custom Group
Stat-Xplore's custom data feature allows you to combine items into your own groupings of values in which you can then use in a table.
To create a custom group:
Click the 'Custom Data' button at the bottom of the field list.
Select the field values you want to group together and click the »» button to add them to the list on the right.

Stat-Xplore will then add to the list on the right.
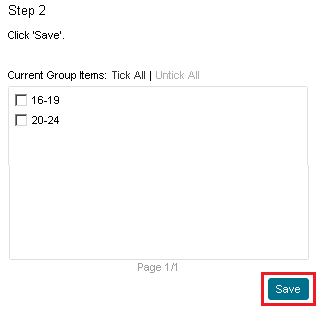
Once you have finished adding all the items you want to group by repeating the steps above, click the ‘Save’ button.
You will be prompted to select the save location and enter a name for the group you have just been creating. Type in the name for the location, choose the location, and click the ‘Save’ button.
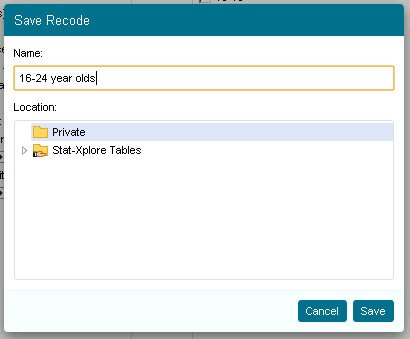
Additionally, you can choose to store your custom groups in a private folder so that it is accessible to you only.
Stat-Xplore with then add the new group to the ‘My Custom Data’ menu.

Once you have created a custom group, you can then add this group to your custom bespoke table. Below shows an example:

Editing a Group
Once you have created a custom group, if you need to edit it you can:
In your currently open table, click the ‘Custom Data’ button located at the bottom right of the list of fields at the left-hand side of the page.
Within the ‘My Custom Data’ page, click on the check box next to the group you want to edit.

Click the ‘Edit’ button.
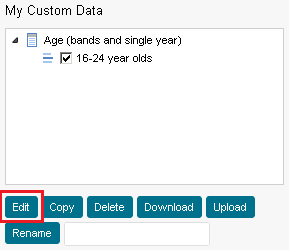
Stat-Xplore adds the contents of your group to the list on the right.
- You can then add and remove items from the group by selecting the item you want to add/remove.
- Next, click either the ' »» ' or ' «« ' buttons depending on whether or not you want the item in your group.
When you have finished making changes, click the ‘Save’ button to keep the changes you have made.

- If at any point you would like to stop editing your group without saving any of your changes, click the ‘Cancel Edit’ button.

Renaming a Group
To rename any private custom groups that you have created,
In your currently open table, click the ‘Custom Data’ button located at the bottom right of the list of fields at the left-hand side of the page.
Within the ‘My Custom Data’ page, click on the check box next to the group you want to edit.

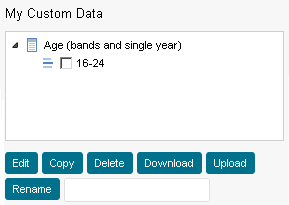
Inside of the ‘Rename’ field, type in a new name for the group. The name must be unique and contain less than 255 characters.
Click the ‘Rename’ button.
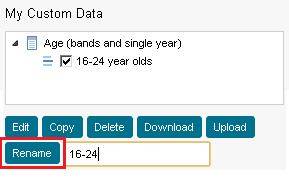
Stat-Xplore will then rename the custom group.

Copying a Group
Another function when creating, using, and editing your custom groups is that you can also create copies of any previously created private custom groups.
To do this,
In your currently open table, click the ‘Custom Data’ button located at the bottom right of the list of fields at the left-hand side of the page.
Within the ‘My Custom Data’ page, click on the check box next to the group you want to edit.

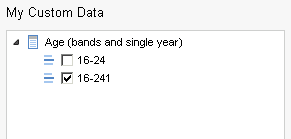
Click the ‘Copy’ button.
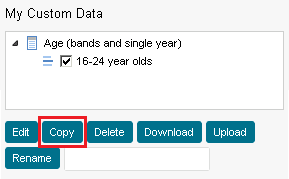
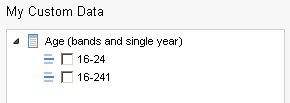
Stat-Xplore will then create a copy of the group with a ‘1’ appended to the end of the name.
Deleting a Group
If you would like to delete a custom group,
In your currently open table, click the ‘Custom Data’ button located at the bottom right of the list of fields at the left-hand side of the page.
Within the ‘My Custom Data’ page, click on the check box next to the group you want to edit.
Click the ‘Delete’ button.

- Stat-Xplore will then remove the custom group from your list.
Further Questions
If you still have any questions that are not answered in the guide, please feel free to email Stat.Xplore@dwp.gov.uk
Check your Knowledge!
What is the purpose of creating, using, and editing custom groups in Stat-Xplore?
A. To allow the better manual application of tables in Table View to Graph View
B. For greater reliability when retrieving data
C. Allows you to a personally curated a group of fields to more conveniently apply to your custom bespoke tables.
D. All of the above

